A worker service gives some kind of super-power to a console application.
A worker service in .NET is a console app that runs a long-running task once the application is started, till it's signaled to close.
It does not require user interaction.
It runs on top of the concept of a host, which maintains the lifetime of the application.
Worker service provides important features common to ASP.NET Core, such as dependency injection, logging, and configuration.
In this article, I'll guide you through
- Creating a worker service,
- Using Entity Framework to create a database,
- Writing data into the database, and
- Accessing and displaying data from the database non-stop.
Let's get started!
First things first, ensure you have the Visual Studio IDE installed.
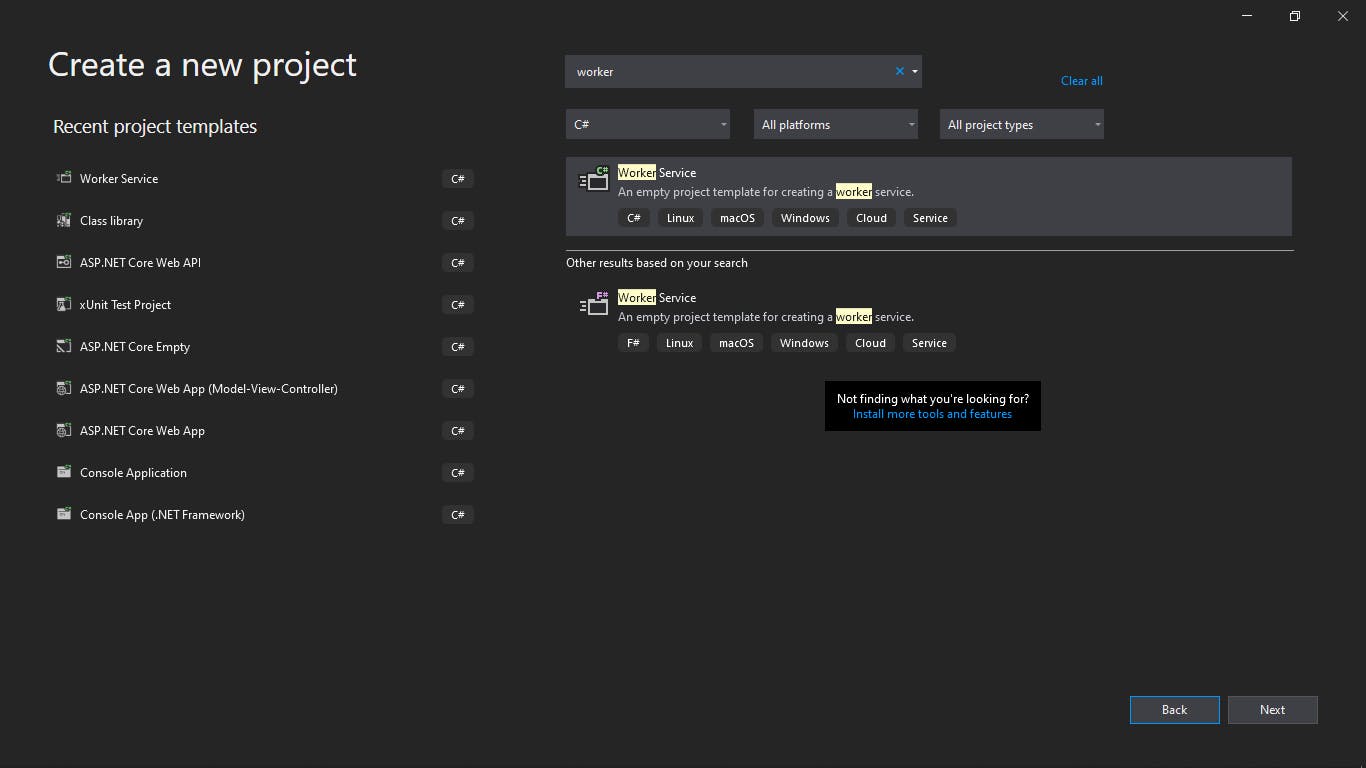
Open Visual Studio, and click on Create a new project
On the search box, search for "worker service".
Select the Worker Service template with a "C#" tag.

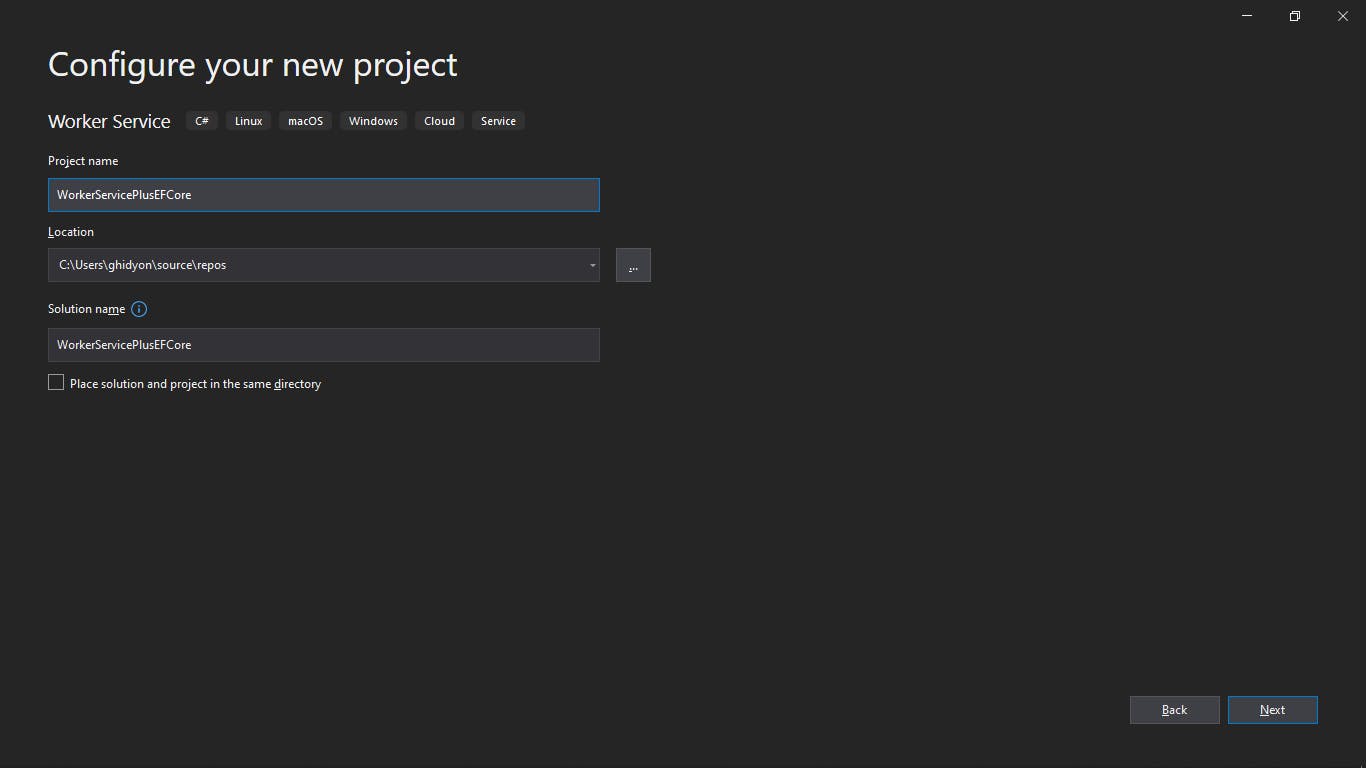
Configure your new project and proceed.
Set target framework to .NET Core 3.1 (Long Term Support).

Once the project is created, the worker service template will provide the following files on the Solution Explorer tab.
Worker.csfileProgram.csfileappsettings.jsonfile
Worker.cs File
In our worker service template, components like Dependency Injection and Logger are provided out of the box.
The Worker class derives from BackgroundService abstract base class.
The BackgroundService class provides an abstract method named ExecuteAsync, which we must override in our Worker class.
ExecuteAsync() method basically houses some long-running task, which the BackgroundService class expects.
Once the Task is started, it runs in the background.
Let's have a look at Worker.cs file.
public class Worker : BackgroundService
    {
        private readonly ILogger<Worker> _logger;

        public Worker(ILogger<Worker> logger)
        {
            _logger = logger;
        }

        protected override async Task ExecuteAsync(CancellationToken stoppingToken)
        {
            while (!stoppingToken.IsCancellationRequested)
            {
                _logger.LogInformation("Worker running at: {time}", DateTimeOffset.Now);

                await Task.Delay(1000, stoppingToken);
            }
        }
    }
Program.cs file
This is the entry point for the console application.
Here, a host is created and run to manage the application's lifetime and make a long-running service.
public class Program
    {
        public static void Main(string[] args)
        {
            CreateHostBuilder(args).Build().Run();
        }

        public static IHostBuilder CreateHostBuilder(string[] args) =>
            Host.CreateDefaultBuilder(args)
                .ConfigureServices((hostContext, services) =>
                {
                    services.AddHostedService<Worker>();
                });
    }
appsettings.json file
This file contains JSON, structured to contain keys and values representing the application's configuration.
The default Logger configurations are already configured here.
The host is configured to load the application configurations when the application starts.
{
  "Logging": {
    "LogLevel": {
      "Default": "Information",
      "Microsoft": "Warning",
      "Microsoft.Hosting.Lifetime": "Information"
    }
  }
}
Now that we've known what each file in the worker service template does, let's move on to installing the required packages for Entity Framework Core.
Microsoft.EntityFrameworkCore - v5.0.4
Microsoft.EntityFrameworkCore.SqlServer - v5.0.3
Once we've installed these packages, let's create a User Model for our database.
Create a Models folder and add User class.
public class User
    {
        public Guid Id { get; set; }
        public string Name { get; set; }
        public string Email { get; set; }
    }
Now that we have our User model ready, let's create the application's database context, AppDbContext.
Create AppDbContext class deriving from DbContext class and add the code below.
using Microsoft.EntityFrameworkCore;

namespace WorkerServicePlusEFCore.Models
{
    public class AppDbContext : DbContext
    {
        public DbSet<User> Users { get; set; }

        public AppDbContext(DbContextOptions<AppDbContext> options) : base(options)
        {
        }
    }
}
We want to be able to add users to the database and read the data from the database.
Hence, we'd create DbHelpers.cs under Services folder.
using Microsoft.EntityFrameworkCore;
using System;
using System.Collections.Generic;
using System.Linq;
using WorkerServicePlusEFCore.Models;

namespace WorkerServicePlusEFCore.Services
{
    public class DbHelper
    {
        private AppDbContext _dbContext;

        private DbContextOptions<AppDbContext> GetAllOptions()
        {
            DbContextOptionsBuilder<AppDbContext> optionsBuilder = new DbContextOptionsBuilder<AppDbContext>();

            optionsBuilder.UseSqlServer(AppSettings.ConnectionString);

            return optionsBuilder.Options;
        }

        public List<User> GetUsers()
        {
            using (_dbContext = new AppDbContext(GetAllOptions()))
            {
                try
                {
                    var users = _dbContext.Users.ToList();

                    if (users == null)
                        throw new InvalidOperationException("No user data is found!");

                    return users;
                }
                catch (Exception)
                {
                    throw;
                }
            }
        }


        // Seed Data - When no data is in the db, we want to populate with data
        public void SeedUsers()
        {
            using (_dbContext = new AppDbContext(GetAllOptions()))
            {
                _dbContext.Users.AddRange(ListOfUsers());

                _dbContext.SaveChanges();
            }
        }

        private List<User> ListOfUsers()
        {
            List<User> users = new List<User> {
                new User
                {
                    Name = "Jay Jay",
                    Email = "jayjay@gmail.com"
                },

                new User
                {
                    Name = "Kanu Nwankwo",
                    Email = "kanunwankwo@gmail.com"
                },

                new User
                {
                    Name = "Taribo West",
                    Email = "taribowest@gmail.com"
                }

            };

            return users;
        }
    }
}
We have created methods inside the DbHelpers to seed data and also return data.
But take note of the GetAllOptions method, something is missing.
A connection string is required for the UseSqlServer() method.
Let's create a connection string for the database in our appsettings.json file.
{
  "Logging": {
    "LogLevel": {
      "Default": "Information",
      "Microsoft": "Warning",
      "Microsoft.Hosting.Lifetime": "Information"
    }
  },
  "ConnectionStrings": {
    "DefaultConnection": "Data Source=Your_Server;Initial Catalog=Your_Db;Integrated Security=True;Connect Timeout=30;Encrypt=False;TrustServerCertificate=False;ApplicationIntent=ReadWrite;MultiSubnetFailover=False"
  }
}
But how do we access the ConnectionString value?
Let's create an AppSettings class in the Model folder, with the code below
namespace WorkerServicePlusEFCore.Models
{
    public static class AppSettings
    {
        public static string ConnectionString { get; set; }
    }
}
We'd use this class to assign the values of IConfiguration Service and Connection String by reading the appsettings.json file.
Now, let's move to the Worker class to configure the long-running task inside the ExecuteAsync() method.
Recall that we want to get Users from the database and display them on the console, non-stop.
Changes were made to the ExecuteAsync() method and a DisplayUserInformation() method was added.
using Microsoft.Extensions.Hosting;
using Microsoft.Extensions.Logging;
using System;
using System.Collections.Generic;
using System.Threading;
using System.Threading.Tasks;
using WorkerServicePlusEFCore.Models;
using WorkerServicePlusEFCore.Services;

namespace WorkerServicePlusEFCore
{
    public class Worker : BackgroundService
    {
        private readonly ILogger<Worker> _logger;


        public Worker(ILogger<Worker> logger)
        {
            _logger = logger;
        }

        protected override async Task ExecuteAsync(CancellationToken stoppingToken)
        {
            while (!stoppingToken.IsCancellationRequested)
            {
                _logger.LogInformation("Worker running at: {time}", DateTimeOffset.Now);

                DbHelper dbHelper = new DbHelper();

                // fetch user data
                List<User> users = dbHelper.GetUsers();

                if (users.Count == 0)
                {
                    dbHelper.SeedUsers();
                }
                else
                {
                    DisplayUserInformation(users);
                }

                await Task.Delay(10000, stoppingToken);
            }
        }

        private void DisplayUserInformation(List<User> users)
        {
            users?.ForEach(user =>
            {
                _logger.LogInformation($"User Information\nUser: {user.Name}\t Email: {user.Email}");
            });
        }
    }
}
Observe that we also added a delay of 10seconds to the Task.
The DisplayUserInformation() method logs the information of every user retrieved from the database.
The Worker class is now ready to execute a task, but one thing is remaining.
To be able to run the Task, we need to plug in the various services.
Let's plug AppDbContext into the Program.cs file. Check the code below.
 public static IHostBuilder CreateHostBuilder(string[] args) =>
            Host.CreateDefaultBuilder(args)
                .ConfigureServices((hostContext, services) =>
                {
                    IConfiguration configuration = hostContext.Configuration;

                    AppSettings.ConnectionString = configuration.GetConnectionString("DefaultConnection");

                    var optionsBuilder = new DbContextOptionsBuilder<AppDbContext>();

                    optionsBuilder.UseSqlServer(AppSettings.ConnectionString);

                    services.AddScoped<AppDbContext>(db => new AppDbContext(optionsBuilder.Options));

                    services.AddHostedService<Worker>();
                });
We got access to the Connection String as well, and saved it in the AppSettings object.
Recall that, it's because we want to be able to access it in the DbHelper class.
Update the GetAllOptions() method in the DbHelper.cs file, to access the Connection String.
optionsBuilder.UseSqlServer(AppSettings.ConnectionString);
One last thing is remaining.
We need to create a method to check if a database has been created, then proceed to run the task.
Add the code below to your Program.cs file.
private static void CreateDbIfNoneExist(IHost host)
        {
            using (var scope = host.Services.CreateScope())
            {
                var service = scope.ServiceProvider;

                try
                {
                    var context = service.GetRequiredService<AppDbContext>();
                    context.Database.EnsureCreated();
                }
                catch (Exception)
                {

                    throw;
                }
            }
        }
The method above will get the database context and check if there is an existing database.
If there's no database existing, it'd create it.
Now we're good to go.
The worker service is ready to run.
Let's call the methods in the application's entry point.
public static void Main(string[] args)
        {
            IHost host = CreateHostBuilder(args).Build();

            CreateDbIfNoneExist(host);

            host.Run();

        }
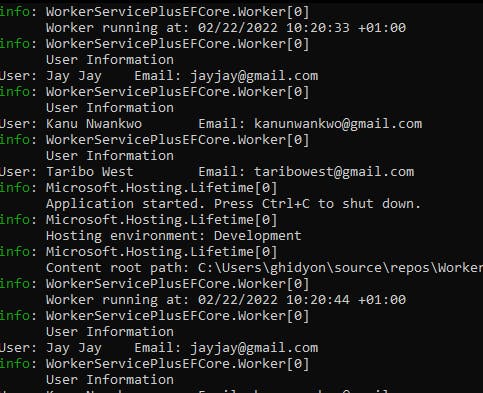
Now run the application, you should get this result.
 The task continually runs and refreshes every 10 seconds.